I Can See
March 25, 2026
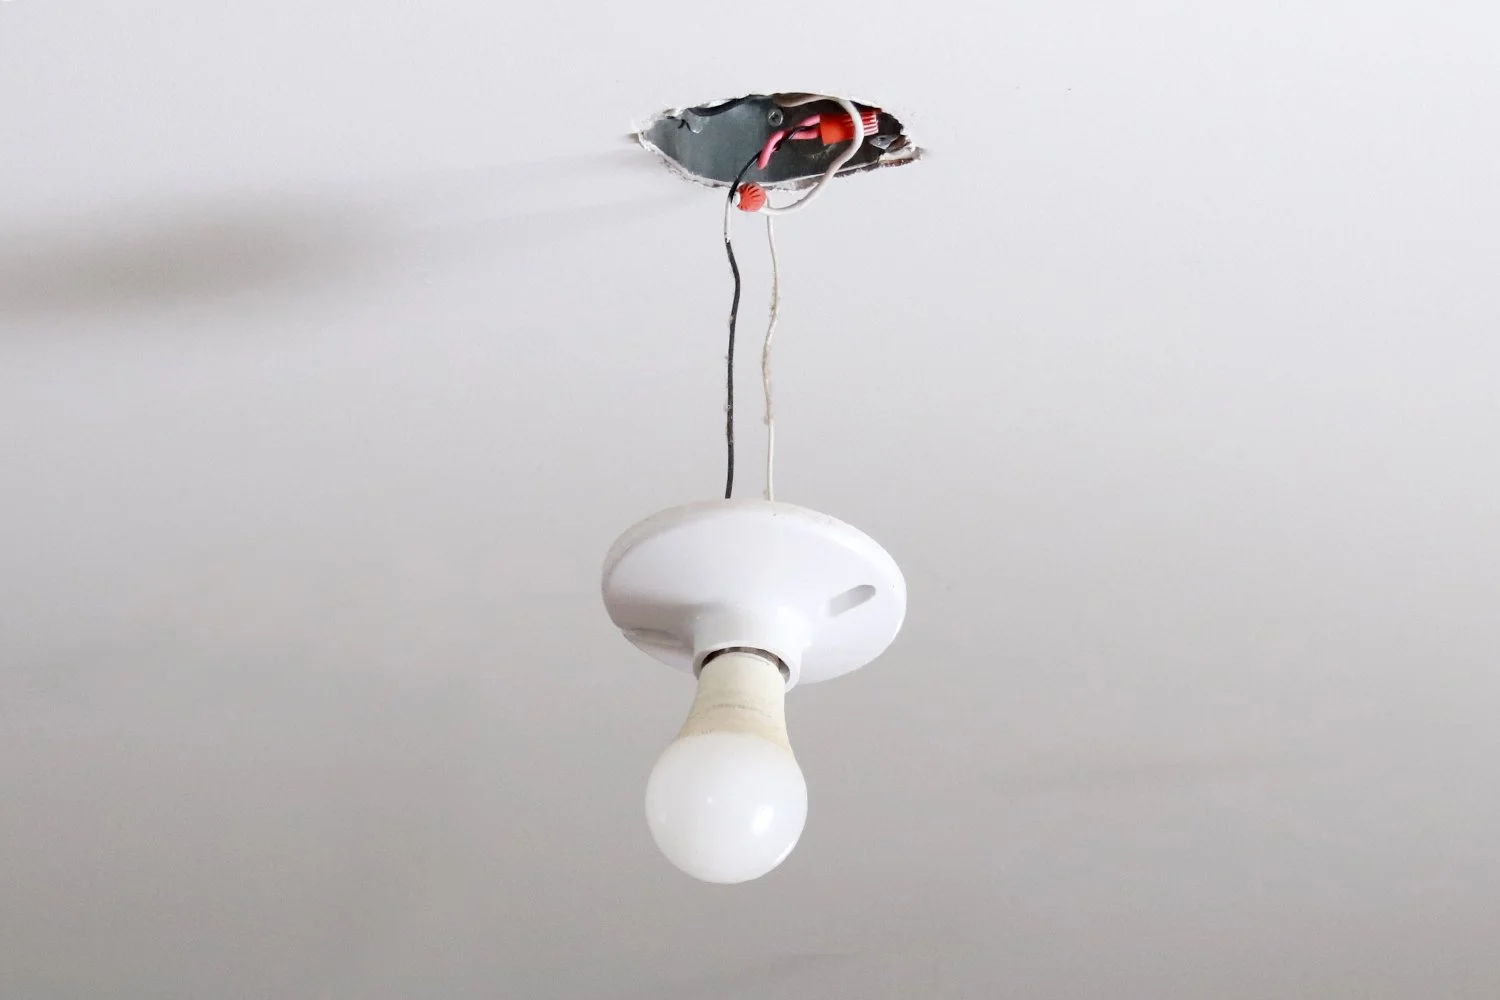
Since I moved in, I have been living with this “light fixture” in my sewing room. It looked like garbage (because it was) and didn’t function much better. Anytime that I really needed the light, the location of the bulb would inevitably cast my shadow right over whatever I was trying to see. More often than not, I had to work with a headlamp on. My ability to put up with infuriatingly annoying things astounds even me. How did it take me five years to finally put up lights that would improve my life on a daily basis? I really wish I knew.
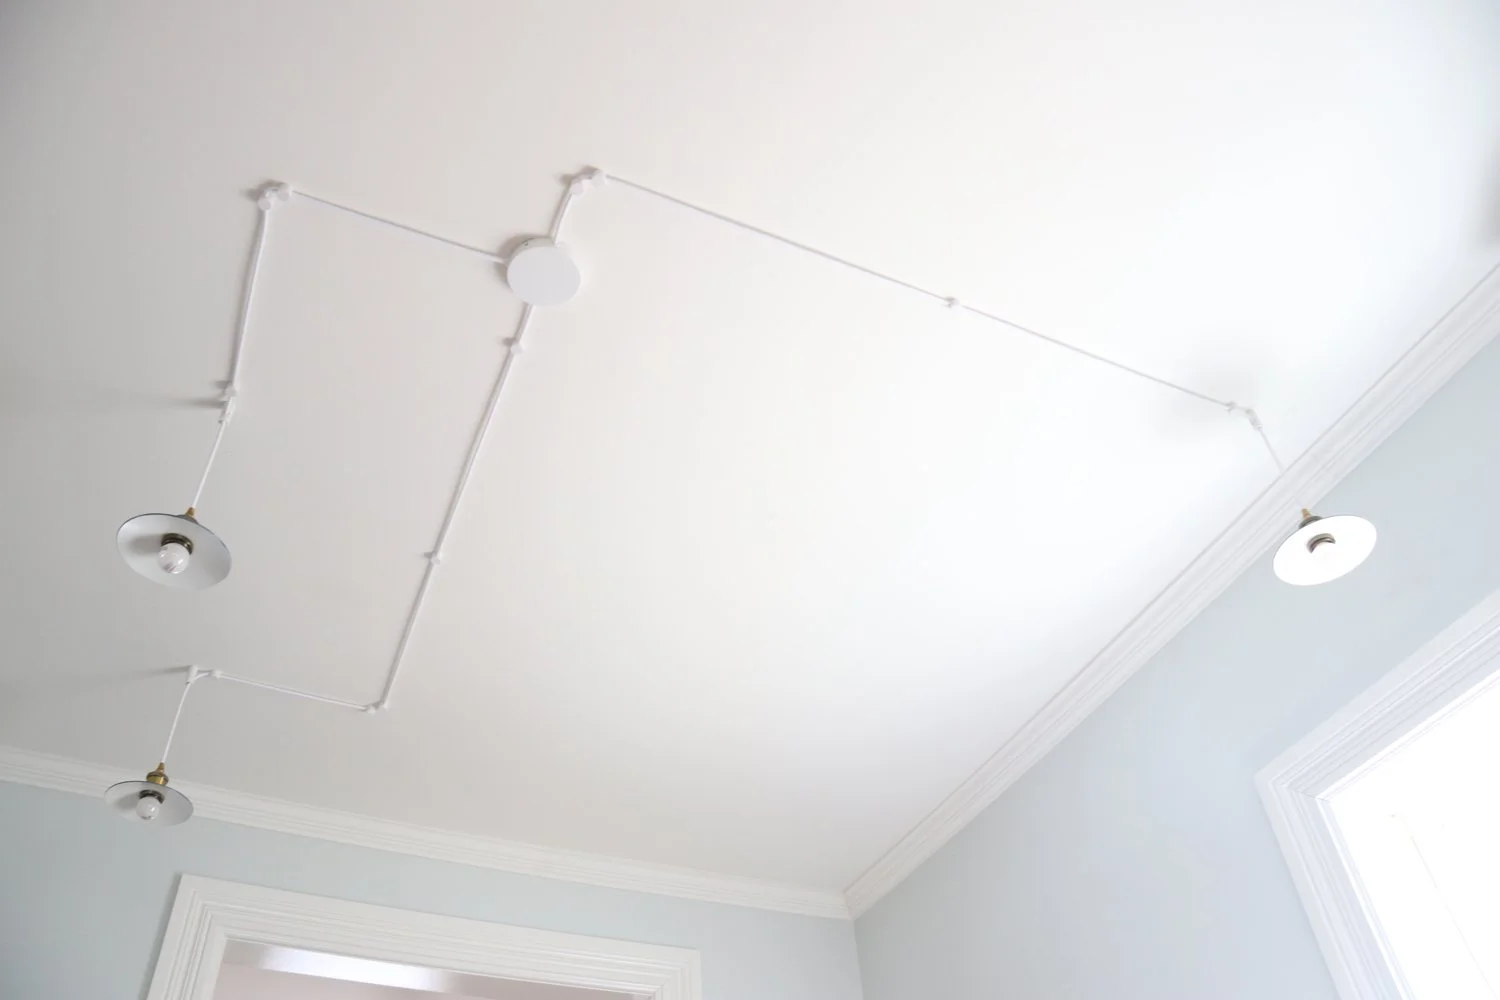
When I was refinishing the floors and putting up the trim in the sewing room I was also working out the lighting. I found a great DIY system that allowed me to use the current light box to send out several cables and put lights exactly where I needed them without adding more light boxes or hiring an electrician. Win. Win.
I was originally thinking that I could buy old crystal plates from the thrift store and drill holes in them to use as the shades. That started to get really complicated so I switched to making some shades using clay. I even purchased the clay. Over a year ago. Over a year ago I purchased the clay. That was at the same time that I purchased all of the parts to make the light fixtures themselves. The entire system and the clay sat there waiting for me and I did nothing. Nothing but curse that dangling light bulb.
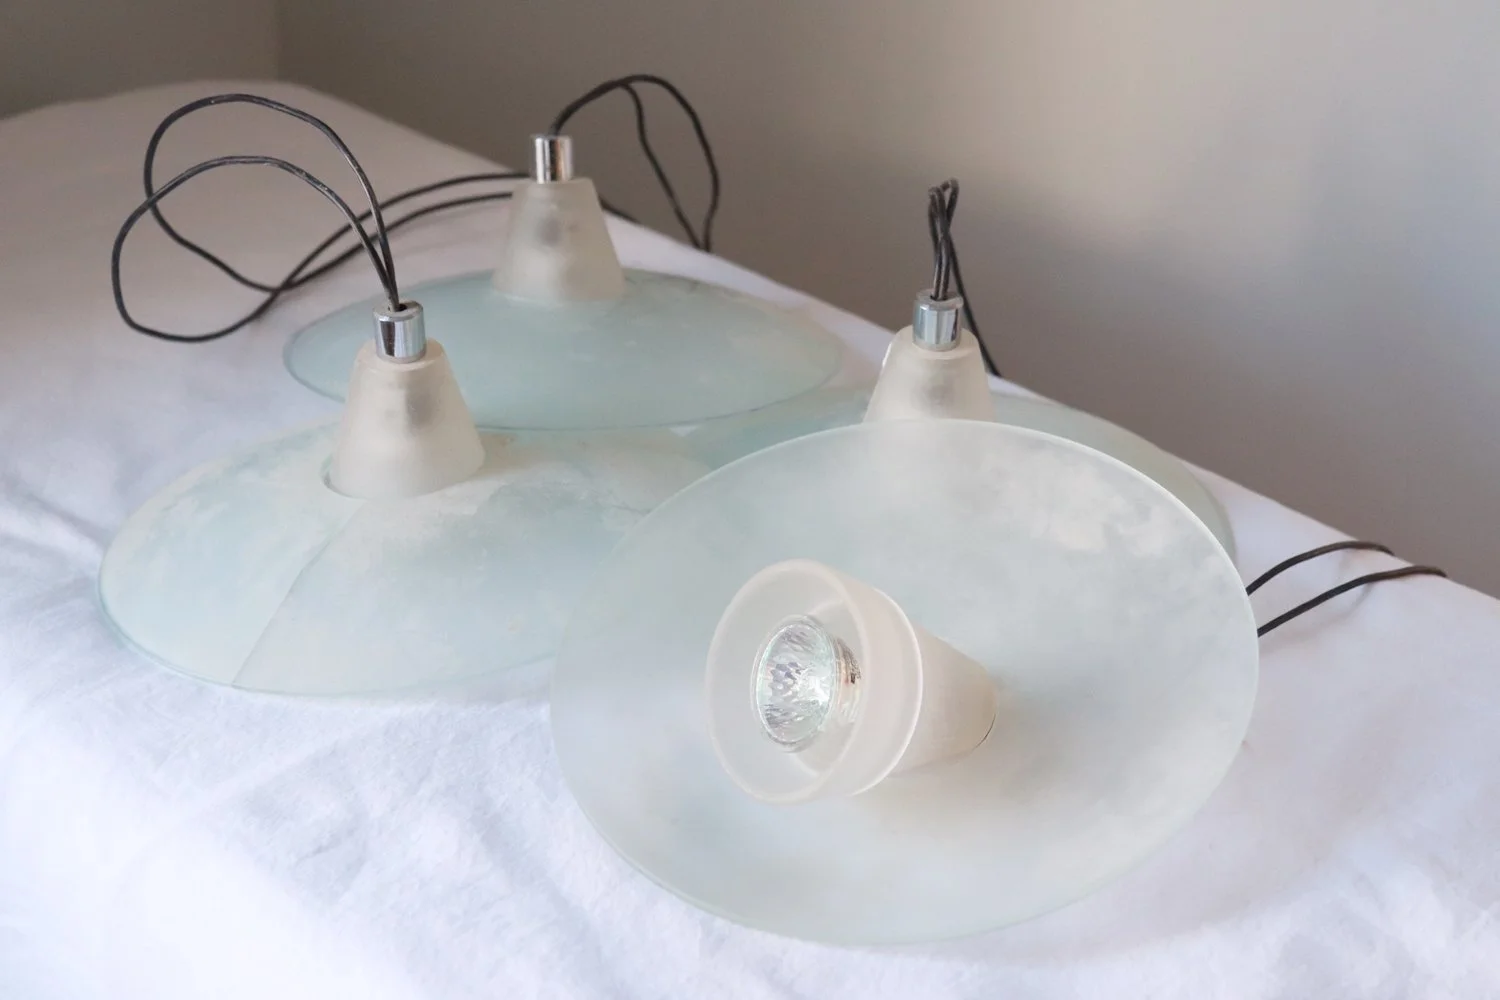
Then I came across these lights in the garbage. It wasn’t that I thought they were all that pretty but there were four shades (exactly the number that I needed) and they looked like the perfect size (and they were). One of the shades was cracked but since I was planning to paint them anyway, I didn’t think it would be a problem. The best part of salvaging these from the garbage was that in a relatively short amount of time I would be able tick this project off of my to-do list.
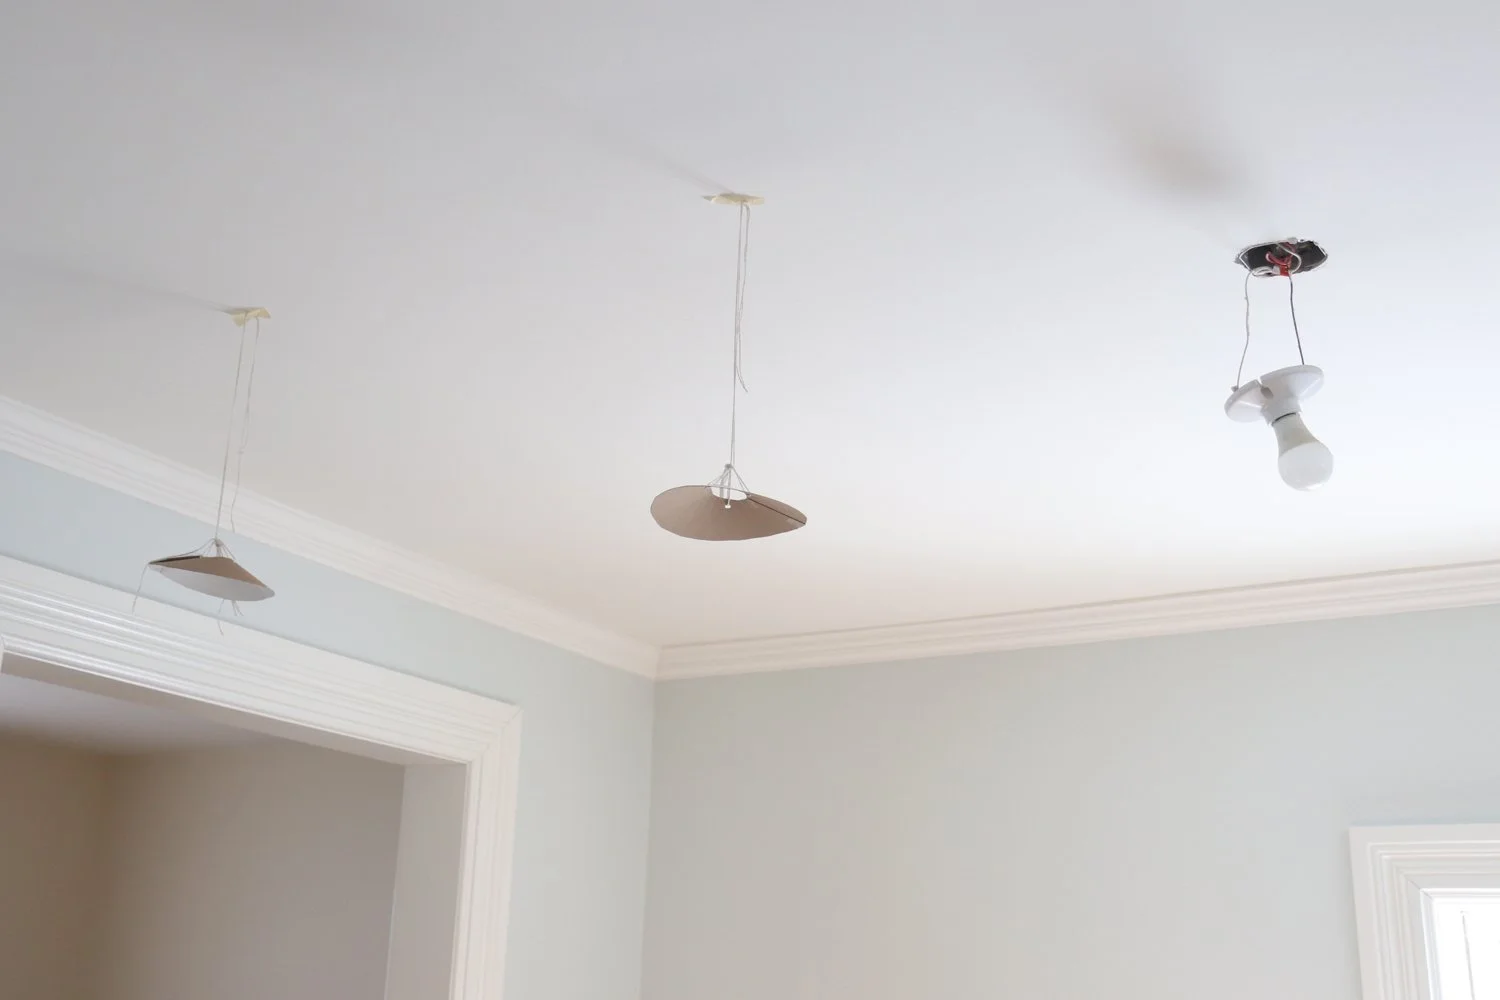
The next order of business was to make some mock-ups and hang them where I thought they would work best. I was able to adjust the height and live with them hanging from the ceiling to ensure I liked the plan before making final decisions and cutting wires.
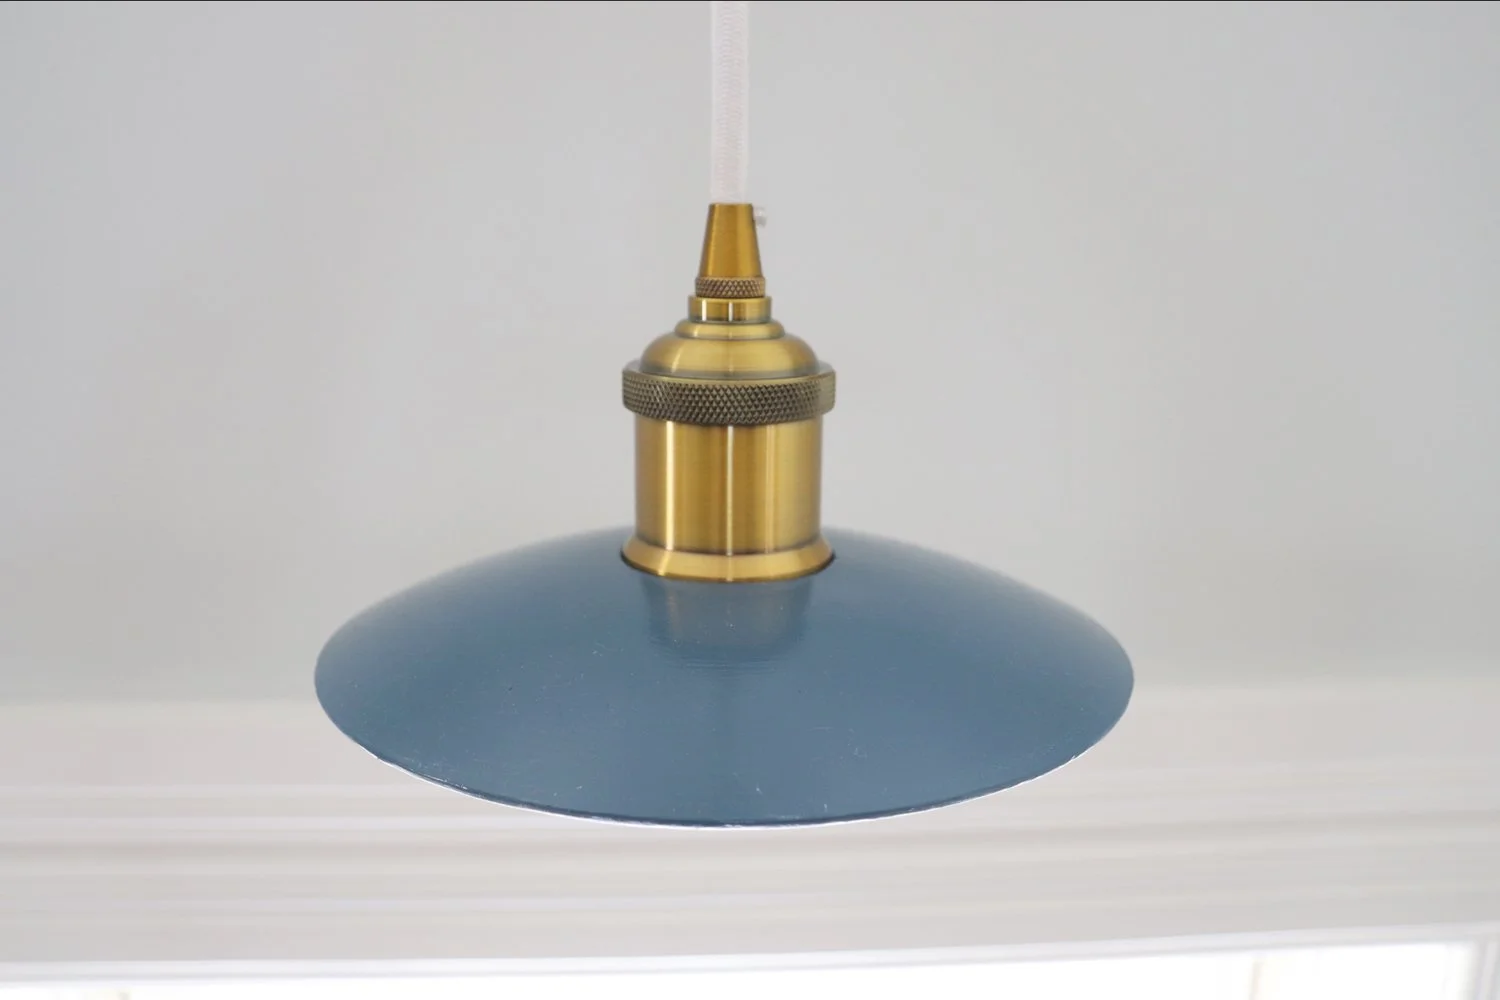
There are three lights hanging in the blue room so I picked a dark blue colour for the top of those lights. The underside is painted the same white as the ceiling. The unfortunate part about my mock-up was that I made the shades deeper than they are in real life. It meant that while I could see the tops of the shades in the mock-up, confirming that painting the tops in a nice bold colour would be a good idea, the reality of the low slope shades means that I can barely see that beautiful colour hiding on the top. On the flip side, it probably also means that people won’t be able to see the dust that will accumulate up there either.
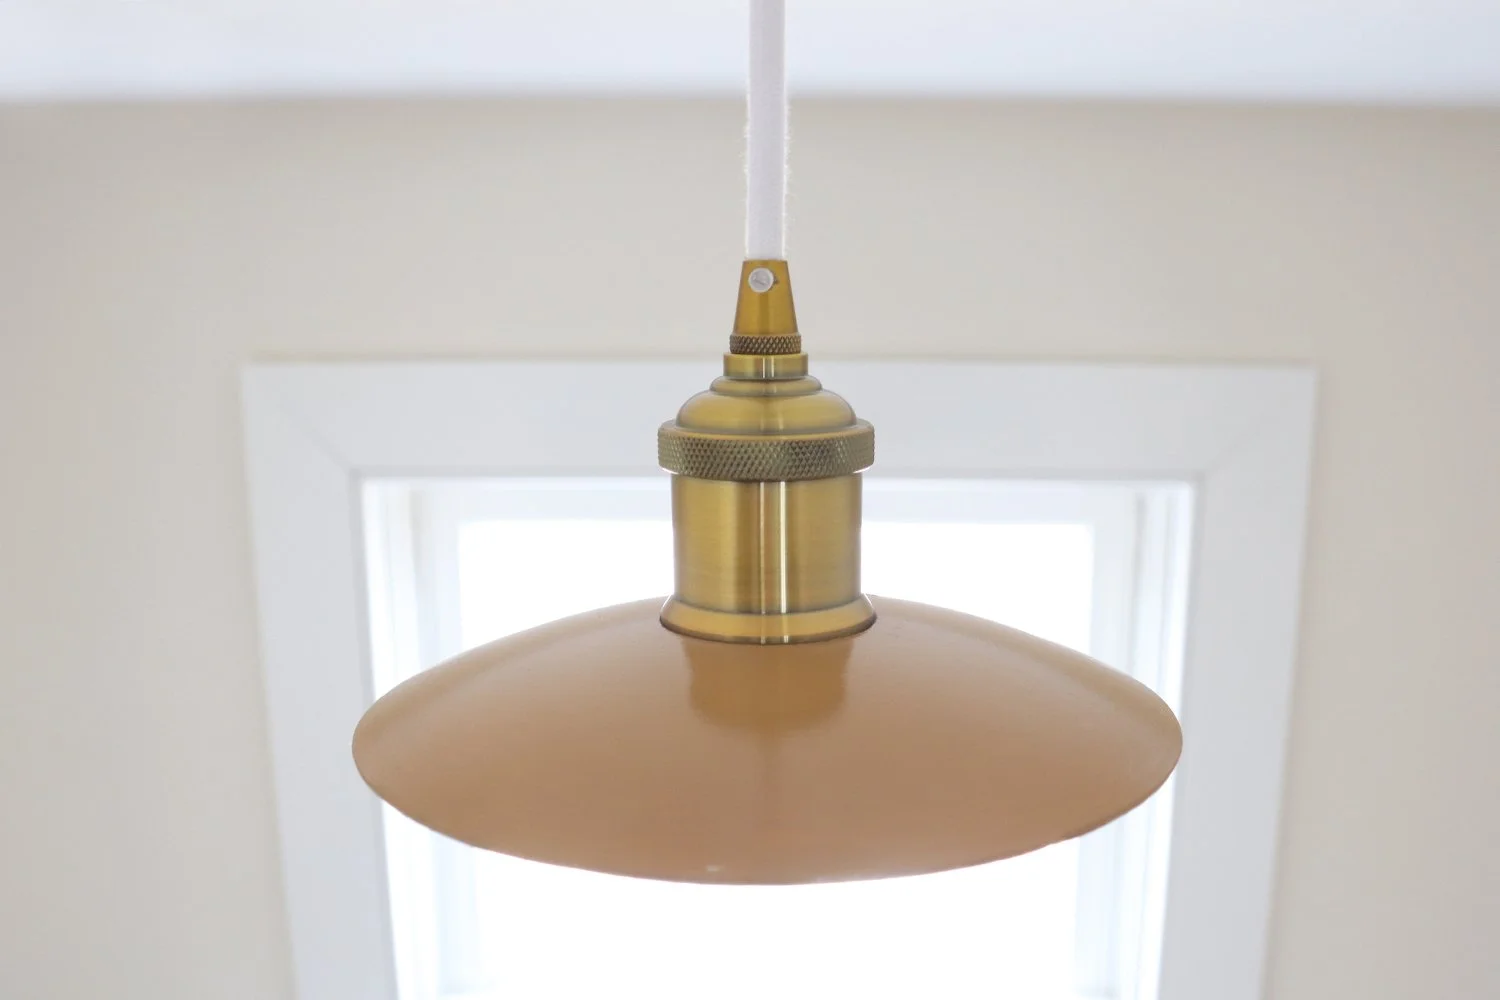
The yellow room only has one light so it hangs straight down from the original light box. I painted that shade a dark gold colour. Again, you can’t really see the top of this one either. This is the least seen light of the four so I thought it would be the best spot for the cracked shade.
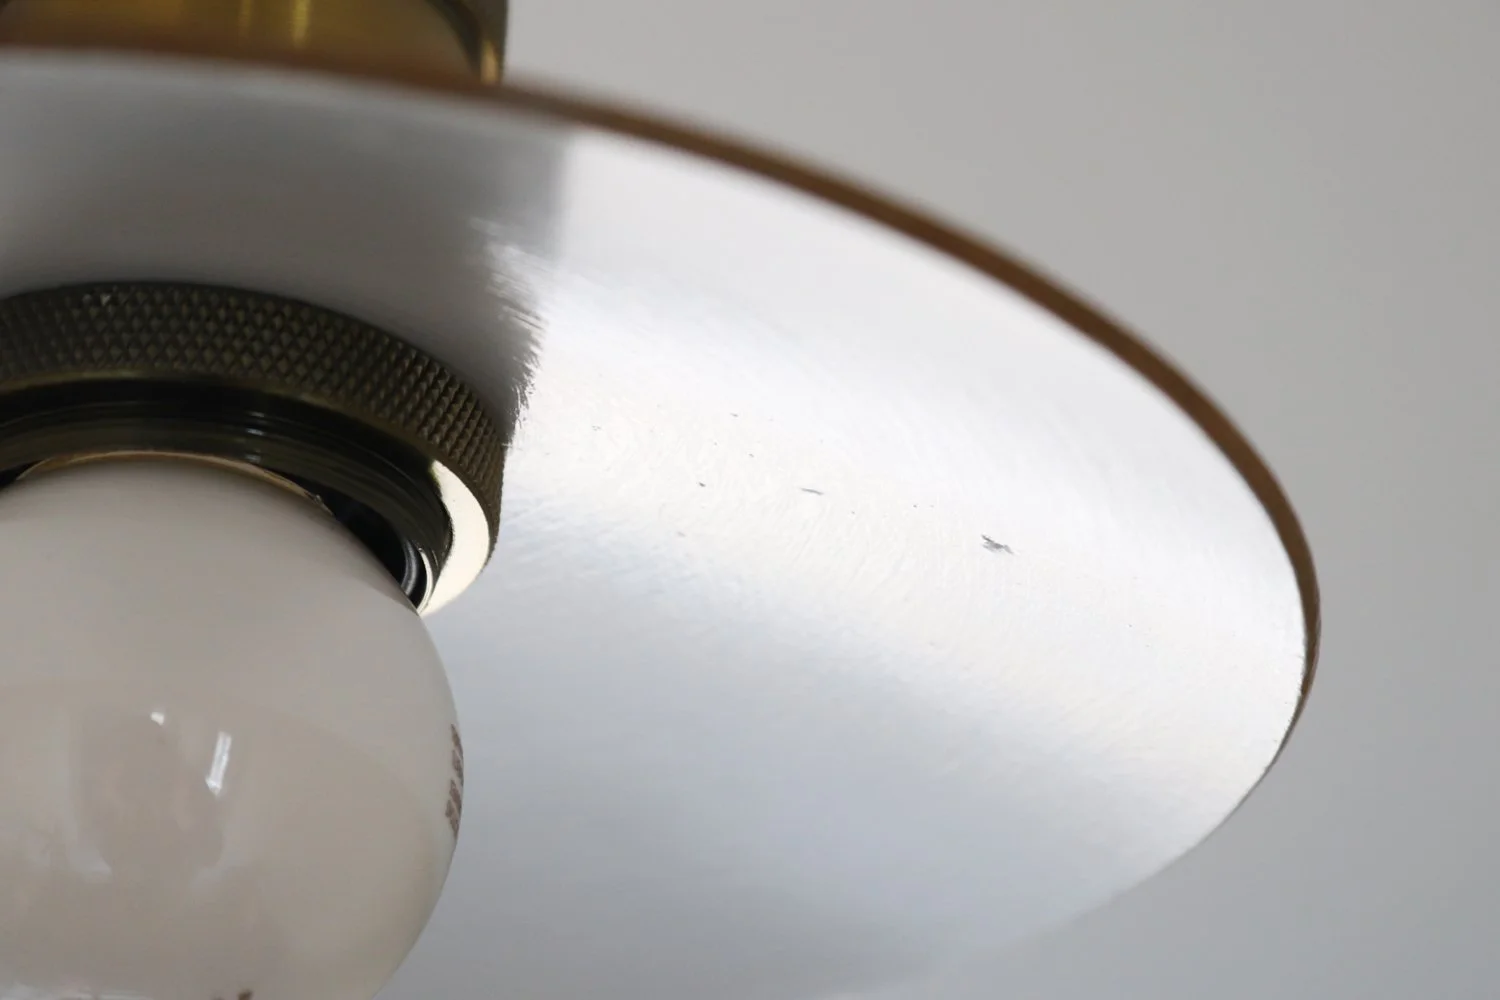
In the end, I don’t think it mattered. You can barely see the crack now that it’s painted. It just looks like a couple of little chips and even then you really have to be looking for them.
I love how the end result is somewhere in between a decor fixture and an industrial fixture. It’s the perfect answer for this room and now I can see.